Have you ever wanted to build your own custom gaming PC? Are you tired of experiencing lag with a frame rate that drops below 16 FPS? This seems to happen a lot with certain “high-production” titles, especially the ones ported from console to PC.
If a game has well-rendered graphics and too many dynamic cutscenes, then it’s not surprising that your standard Windows laptop overloads its limited CPU bandwidth and slows down drastically whenever you forget to turn down the quality.
One of the best advantages of owning a gaming PC is that you can change any part of the operating system to fit your preferred style of gameplay. This includes every piece of hardware that keeps your computer running such as the memory RAM and the Motherboard.
The same goes for internal components you will learn about later on in this tutorial. A gaming PC offers a decent amount of customization when it comes to upgrading your processing power and is perfect for any gamer who wants to enjoy a high frame rate while still maintaining the audio, textures, and default settings of the game engine.
You can say that a gaming PC is designed for maximum immersion. Players will be impressed by its incredible performance when they get to experience a game the way developers intended it. No more getting frustrated when your attacks don’t connect. You don’t have to worry about losing your progress either.
The Advantages of Playing on a Gaming PC
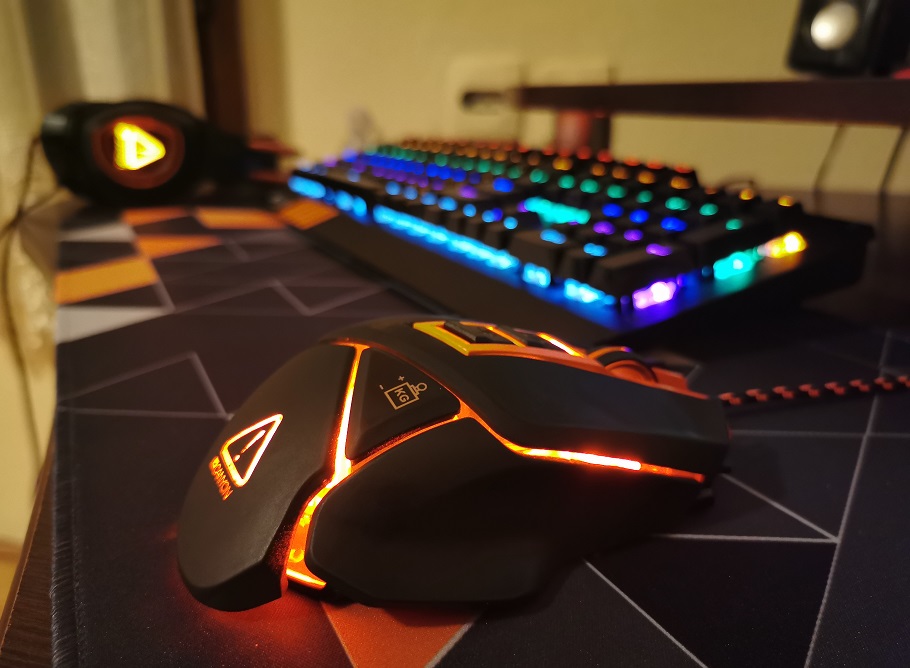
Using a gaming PC, you can set up dual screen monitors to further expand your field of view. A personalized battle station would help you get in the zone, adding another dimension to a competitive multiplayer or PVP battle. For an all-round experience, many professional gamers wear a neon-colored headset to match their LED-light mouse and keyboard.

Your own desktop build will last for years: It means you don’t need to buy a device upgrade every time a new version is released. The only downside is the cost, which is more than any console. Nonetheless, a gaming PC does make up for it by rivaling most consoles performance-wise.
If you want to set up a custom rig, you can follow the steps below to put together a gaming PC capable of running any high-end game. Be sure to plan according to your operating system (i.e. Windows, macOS, or Linux).
Above all, you will need these essential hardware components:
- Computer case
- Desktop monitor
- Main circuit board
- Central processing unit (CPU)
- RAM for memory storage
- Graphics card (GPU)
- Power supply unit (PSU)
- Keyboard/Mouse/Headset
- Cooling system fan
Here are the recommended parts for a sample PC build:
- Intel Core i7-8700K
- G. Skill Trident Z RGB 16GB DDR4-3200
- MSI GeForce RTX 2070 Gaming Z
- Samsung 970 Evo 500GB
- Intel 760p SSD
- EVGA SuperNOVA G3 750w
Step 1: Install the CPU Processor
First, take out the motherboard from its anti-static covering and remove the plastic cap. Press down on the CPU socket lever and pull to release the socket tray. Open the CPU Box and take out the processor. Match the arrows in the correct orientation so that the silver side is facing up. It should fit right in place and rest on top of the pins. Push the lever arm back when you’re done.
Step 2: Insert an M.2 SSD (Optional)
An M.2 SSD is a compact stick that frees up more bandwidth on your computer. With this, it raises the performance of file transfers and media editing. Locate the smaller M.2 slot on your OS drive; you will see a screw in the middle. Unscrew it and slide the M.2 SSD into the slot. To level the SSD with the motherboard, push it down to align, and secure with the tiny screw.
Step 3: Lock the I/O Shield in Place
Now it’s time to loosen the screws holding together your PC case. Lift up the case and put it on a stable surface. Notice the rectangular I/O shield attached to the input and output ports. Fit this shield over the motherboard; the slot should be on the backside of the case. Press firmly to snap the I/O shield in position. If your shield is already attached to the motherboard, this step won’t be necessary at all.
Step 4: Find the Motherboard Standoffs
The case packaging includes a bag filled with screws, zip-ties, and other bits and pieces. They may be gold or threaded on the bottom halves. The top halves have screw holes in them for holding the motherboard in place. Get the screws that are labeled as A, M, or I to indicate circuit boards of various sizes.
Look for metal dots on the motherboard and use a socket wrench or screwdriver to install the standoffs. Check that the I/O ports are lined up along the I/O shield before you tighten the screws. See how the case has a peg that goes through the motherboard’s center hole.
Step 5: Plug in the Case Wires to the Circuit Board
This part might be difficult for newbies because there are many connections between the case and the motherboard. Multiple cables must be attached based on the front panel sections shown. Consult your manual to see where each cable should be connected. Identify the power and reset switch and where the LEDs are located for data storage.
Then, grab the wad of cables that belong inside the case for the USB, fans, and audio ports. Avoid confusing the two as USB and audio connectors appear similar. But don’t worry, they are all labeled to make the process easier. You just have to connect the power and ground wires to the right pins. Install the LED leads and you are good to go!
Step 6: Hook Up the Power Supply
In this step, you will be installing the power supply. Unbox and set aside the cables for now. Gently place the PSU inside the case in which the power plug and on/off switch is facing outwards. You can position the power supply either up or down depending on whether the case has a bottom vent. Regardless, you want the fan to receive air circulation.
Some power supply cables are (completely or partially) modular to determine what connectors to use for the motherboard. Screw in the mounting bracket as well as the power supply slides. Don’t forget to attach the correct cables before you add the case thumbscrews. A fully modular PSU has the 24-pin ATX and secondary 8-pin EPS12V connector on top of one PCIe (8-pin PEG) and SATA/Molex cables.
Feed these cables into the PSU hole while you affix the power supply with thumbscrews. The 24-pin ATX cable connects to the motherboard whereas the EPS12V cable goes through the top-left cutout in the system. The fan controller hubs are simpler to organize than separate Molex connectors.
Step 7: Prepare the CPU AIO Cooler
This step is rather time-consuming since you are installing a CPU cooler. But you do have to affix the mounting bracket to your motherboard in advance. The AIO cooler contains two 120 mm fans. Inspect the cooler to determine its size and clearance. See if there’s enough space left in your case by assessing the parts for compatibility.
Adjust your cooling settings to improve the airflow. Some CPU coolers come with thermal paste to prevent the hardware from overheating. Of course, you can apply a thin layer of your own. Next, you install the water block in an “X” pattern. Notice how the Kraken X62 has several connections: One for each fan, the fan header, and a SATA power cord.
Step 8: Bring Forth the RAM
This part is pretty straightforward.–Remove the RAM sticks from their packaging. Check the RAM slots page in the motherboard manual. It should explain which RAM slots to use depending on how much RAM you have. Push down on the hinged tabs to open the slots. Direct your RAM stick so that the notch is facing the slot. Press it into the slot.
You should hear a clicking sound, ensuring that your PC will reboot the next time you press the power button. The best RAM software should stand out among the long list of DDR4 RAM modules, featuring at least 16 GB of memory space and over 3000HZ in performance speed.
Step 9: Implement Hard Drives/SATA SSDs
Assuming you have a large M.2 SSD, you’re allowed to skip this step completely. But it wouldn’t hurt to have additional hard drives as they provide greater capacity than SSDs despite having a slower speed. A high-end build should have a SATA SSD for smooth backups and extra storage.
Modern cases generally have slide-in trays or plastic runners that lock onto the HDD. Orient the SSD or HDD so the ports are directed outwards. This lets you keep the power and data cables behind the motherboard. Now it’s time to plug the SATA data cable into the small ports on the hard drives.
Next, get the SATA power cable and attach it to the right port on the drive. Make sure to thread your cables through the management openings on the main case and connect them to the SATA data ports on the right end of the motherboard.
Step 10: Update with a New Graphics Card
The graphics card should be inserted into the x16 PCIe slot, the longest one near the CPU socket. Next, take off the expansion slot cover plates using a screwdriver (the left and bottom one) given that it has a dual-slot design. Line up the graphics card with your PCIe interface and press down on it. Rotate the thumbscrews to keep the card from falling out.
The final step involves routing the PEG connectors into two openings next to the graphics card. Plug them into the outlets to supply power to your card. Does it require a 6-pin or 8-pin connection? Are there big clusters of wires in the side panel? The zip-ties and velcro straps will help you wrap up any remaining cables.
Lastly, turn on your computer to see if the monitor is displaying correctly. Insert the keyboard and mouse USB adapters to see if they work. Likewise, you should see the BIOS screen after starting up your PC. If the lights are off, go back and inspect the panel for loose cables.
Take Pride in Your New Gaming PC
When all is said and done, you will have a high-end gaming PC built to last no matter how many games you add to your Steam collection. The final step is to update your motherboard BIOS. Simply download the necessary files on another PC and transfer them through a USB stick to your new desktop.
Now, you’re all set! After assembling a gaming PC from scratch, you’ve earned the right to brag about it on gaming forums, YouTube, or Twitch. Get ready for a unique gaming experience that will be the envy of your friends! After this setup, you won’t have any trouble with upgrading
With any PC, you only have to do some basic maintenance for the upkeep. You can continue to modify it using upgrades or be happy with what you already have. Alternatively, you can just buy a high-performance gaming PC on iBuyPower or order one online from CyberPowerPC.
If you’d rather buy a gaming PC setup than install the hardware manually, you can shop online for the best gaming PCs and their components. But be warned: These models might be out of your budget with prices ranging from $700 to $2000+. Ultimately, does this machine provide toolless access, ventilation, sleek components, a powerful GPU, and a decorative case?
There are a few things to consider in case you’re game: Custom gaming PCs inherit numerous add-ons for boosting performance. As a consequence, you end up with a lot of premium features like RGB, a new monitor, or overclocking. Be on the lookout for quality parts as well as decent system support if you plan on going down this route.
Have you ever attempted to set up a custom gaming PC? Let me know in the comments below if you have installed part upgrades before. Thanks for reading!